Magento 2命令行界面(CLI)工具与Magento 1中的命令行工具不同。在Magento 1中,您只需将脚本添加到“shell”目录,包括abtract.php,并从中进行扩展。Magento 2有点复杂。本文将向您展示如何在Magento 2中创建一个简单的CLI脚本。
首先,我们需要声明一个模块(如果有的话,可以使用现有的模块)。我们需要创建:registration.php,composer.json(实际路径:app / code / Atwix / Shell / composer.json)和etc / module.xml:
| 1 2 3 4 5 6 7 8 9 10 11 12 13 14 | <?php /** * @author Atwix Team * @copyright Copyright (c) 2017 Atwix (https://www.atwix.com/) * @package Atwix_Shell * * path: app/code/Atwix/Shell/registration.php */ \Magento\Framework\Component\ComponentRegistrar::register( \Magento\Framework\Component\ComponentRegistrar::MODULE, 'Atwix_Shell', __DIR__ ); |
| 1 2 3 4 5 6 7 8 9 10 11 12 13 14 15 16 17 18 19 | { "name": "atwix/shell", "description": "Shell script test", "require": { "php": "~5.6.0|~7.0.0" }, "type": "magento2-module", "version": "1.1.7", "license": [ "OSL-3.0", "AFL-3.0" ], "autoload": { "files": [ "registration.php" ], "psr-4": { "Atwix\\Shell\\": "" } } } |
| 1 2 3 4 5 6 7 8 9 10 11 12 13 14 15 16 | <?xml version="1.0"?> <!-- /** * @author Atwix Team * @copyright Copyright (c) 2017 Atwix (https://www.atwix.com/) * @package Atwix_Shell * * path: app/code/Atwix/Shell/etc/module.xml */ --> <config xmlns:xsi="http://www.w3.org/2001/XMLSchema-instance" xsi:noNamespaceSchemaLocation="urn:magento:framework:Module/etc/module.xsd"> <module name="Atwix_Shell" setup_version="1.0.0"> <sequence> </sequence> </module> </config> |
现在,让我们自己创建一个简单的脚本:
| 1 2 3 4 5 6 7 8 9 10 11 12 13 14 15 16 17 18 19 20 21 22 23 24 25 26 27 28 29 30 31 32 33 34 35 36 | <?php /** * @author Atwix Team * @copyright Copyright (c) 2017 Atwix (https://www.atwix.com/) * @package Atwix_Shell * * path: app/code/Atwix/Shell/Console/Command/TestCommand.php */ namespace Atwix\Shell\Console\Command; use Symfony\Component\Console\Command\Command; use Symfony\Component\Console\Input\InputInterface; use Symfony\Component\Console\Output\OutputInterface; /** * Class TestCommand */ class TestCommand extends Command { /** * {@inheritdoc} */ protected function configure() { $this->setName('atwix:test')->setDescription('Test console command'); } /** * {@inheritdoc} */ protected function execute(InputInterface $input, OutputInterface $output) { $output->writeln("Hello world!"); } } |
我们的类扩展了\ Symfony \ Component \ Console \ Command \ Command并有两种方法:
- configure – 设置命令名称和简短描述;
- execute – 包含实际的脚本逻辑。
现在我们需要注册我们的脚本。为了做到这一点,我们需要将对我们的类的引用传递给Magento \ Framework \ Console \ CommandListInterface构造函数作为“命令”数组参数的项。我们将为此目的使用di.xml:
| 1 2 3 4 5 6 7 8 9 10 11 12 13 14 15 16 17 18 19 | <?xml version="1.0"?> <!-- /** * @author Atwix Team * @copyright Copyright (c) 2017 Atwix (https://www.atwix.com/) * @package Atwix_Shell * * path: app/code/Atwix/Shell/etc/di.xml */ --> <config xmlns:xsi="http://www.w3.org/2001/XMLSchema-instance" xsi:noNamespaceSchemaLocation="urn:magento:framework:ObjectManager/etc/config.xsd"> <type name="Magento\Framework\Console\CommandListInterface"> <arguments> <argument name="commands" xsi:type="array"> <item name="atwix_test" xsi:type="object">Atwix\Shell\Console\Command\TestCommand</item> </argument> </arguments> </type> </config> |
我们准备好了。现在我们需要安装我们的扩展:
| 1 2 | cd path/to/your/magento2/installation bin/magento setup:upgrade |
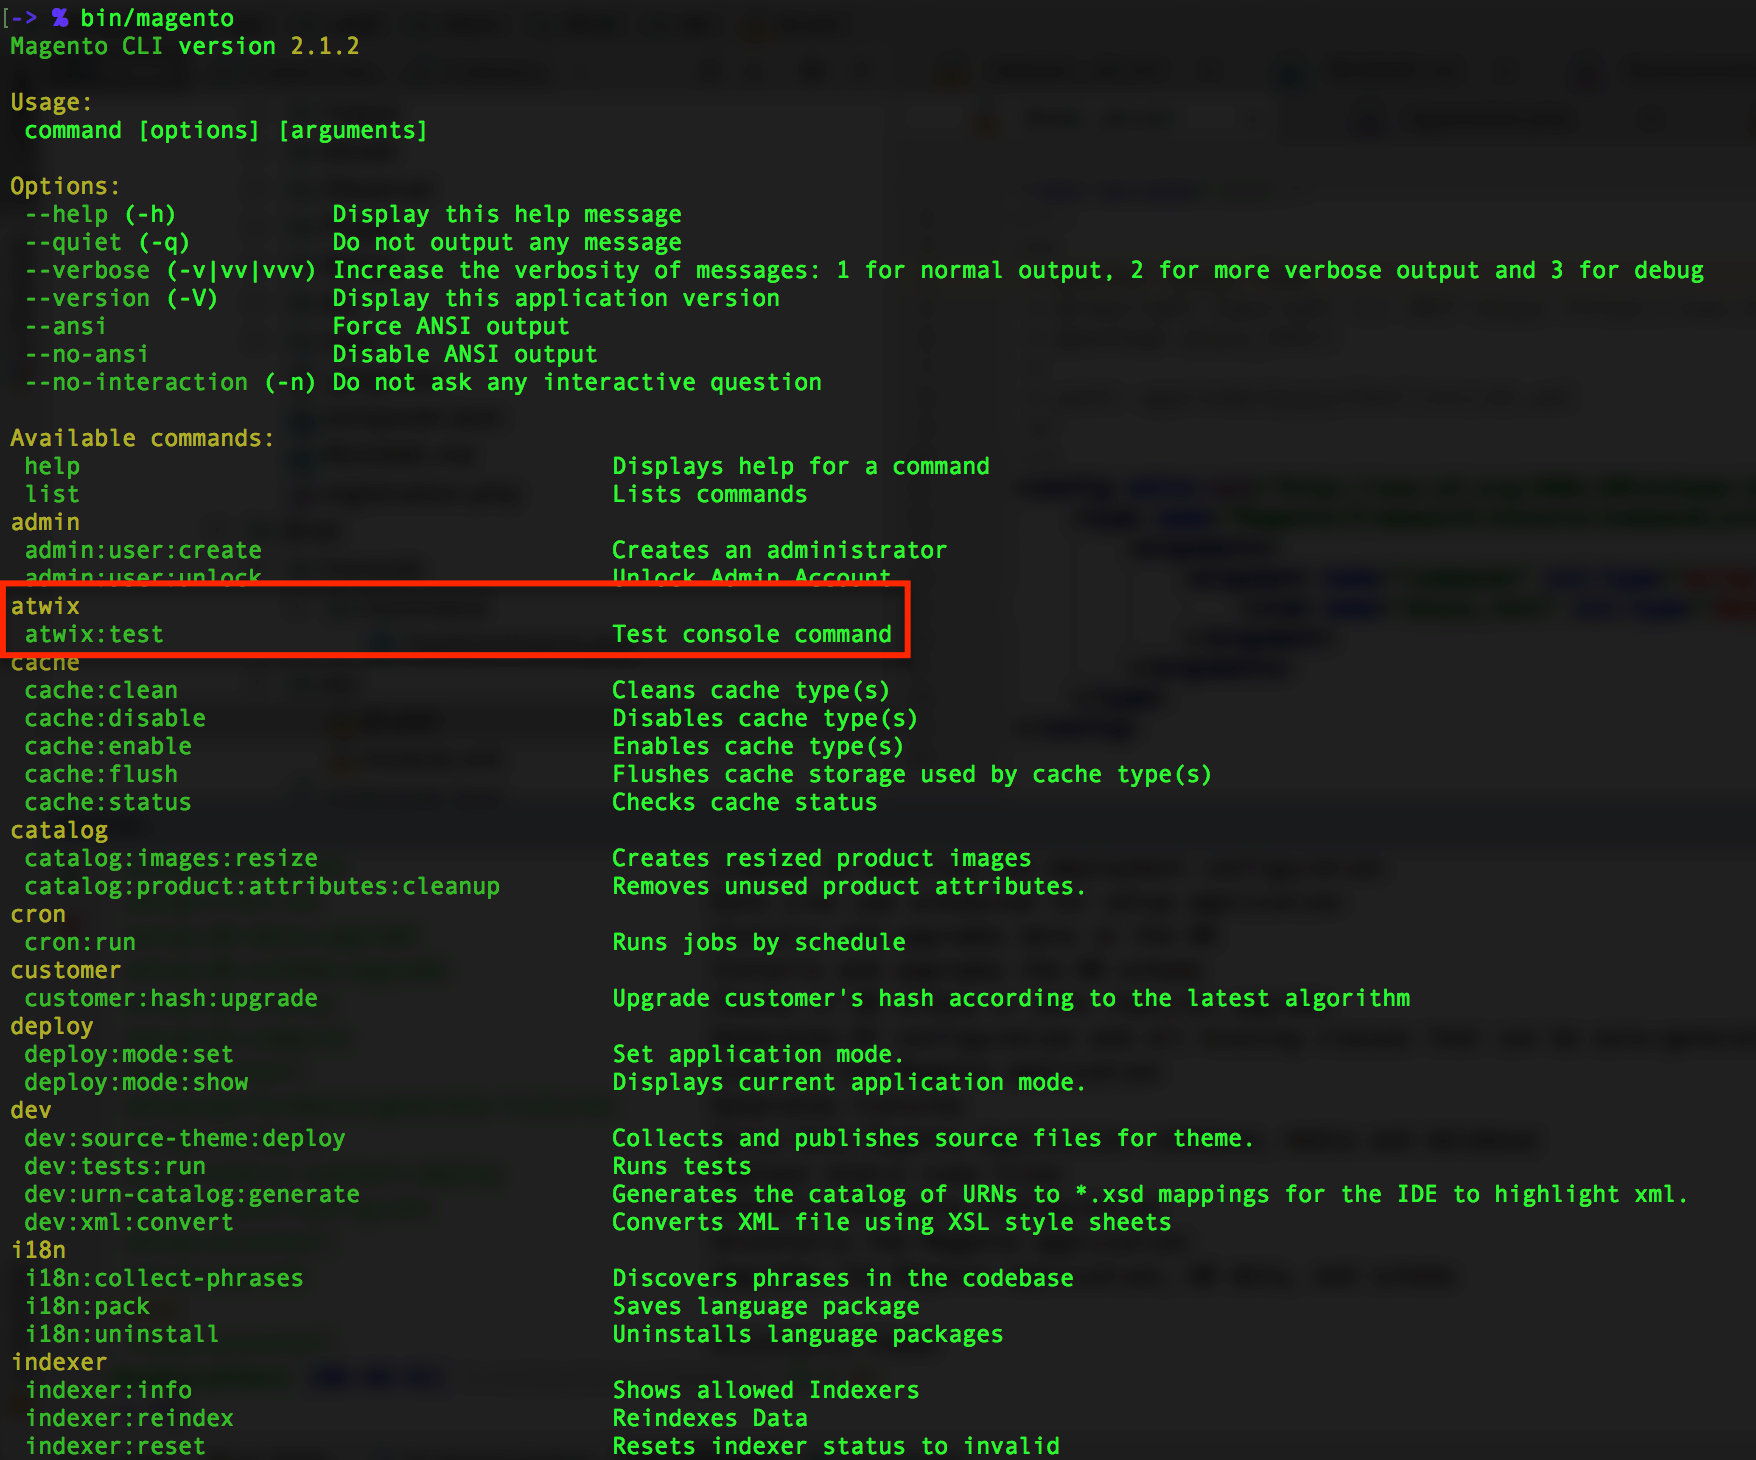
我们将能够在可用的bin / magento选项列表中看到我们的test命令:

如果我们尝试运行它,我们将得到一个理想的结果:

因此,为了在Magento 2中获取我们的CLI脚本,我们需要一个模块,一个继承自\ Symfony \ Component \ Console \ Command \ Command的类,以及一个di.xml中我们类的声明。
就这样!感谢阅读和学习!
